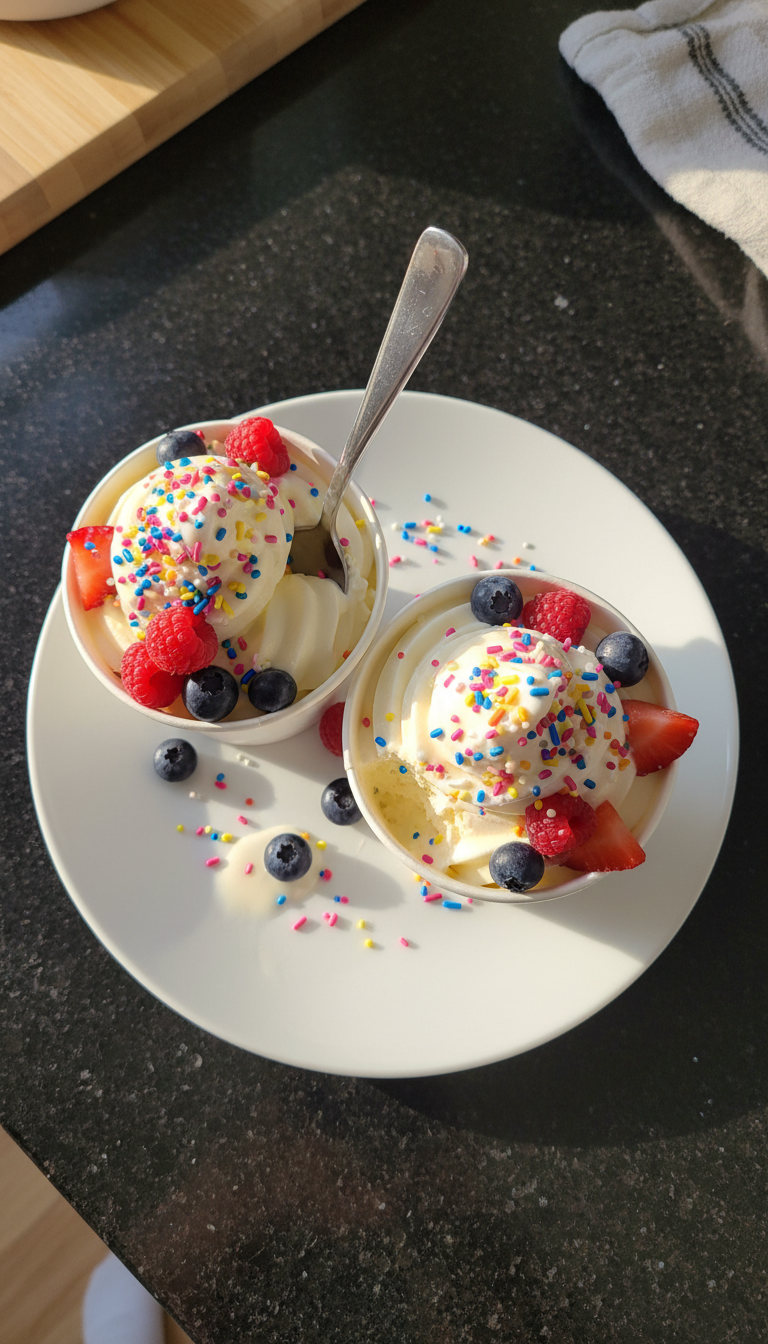
Frozen Yogurt Ice Cream Cups
Highlighted under: Artisanal Baking Recipes
I love making Frozen Yogurt Ice Cream Cups during warm summer days. They are a delightful treat that combines creamy yogurt with a burst of fruity flavor, making them both refreshing and satisfying. The best part? They are incredibly easy to prepare, and you can customize them with your favorite toppings. Whether I’m serving them at a family gathering or enjoying one as a quick snack, these cups always bring smiles to the table. Plus, they are healthier than traditional ice cream, making them a guilt-free indulgence!
When I first tried making Frozen Yogurt Ice Cream Cups, I was amazed at how simple yet delicious they turned out. I used Greek yogurt for its creamy texture, blending it with a handful of fresh berries for a burst of flavor. The key to a perfect cup is to freeze them for at least a couple of hours, allowing the yogurt to firm up without losing its smoothness.
What I love about these cups is their versatility; you can add whatever fruits or toppings you like. My go-to is a mix of granola and honey drizzled on top. This combination adds a delightful crunch and sweetness that balances the yogurt perfectly, making it a crowd-pleaser!
Why You Will Love This Recipe
- Creamy yogurt filled with fresh fruit flavors
- Perfectly portioned for guilt-free snacking
- Easily customizable with various toppings
The Importance of Yogurt
Using Greek yogurt as the base for these Frozen Yogurt Ice Cream Cups not only enhances the creaminess but also adds a protein boost, keeping you satisfied for longer. Greek yogurt has a thicker consistency than regular yogurt, which helps achieve that indulgent texture reminiscent of traditional ice cream. Ensure you choose a high-quality yogurt for the best flavor and creamy mouthfeel. Look for brands with minimal additives to maximize health benefits without compromising taste.
The sweetness of the yogurt can vary depending on the brand, so adjust the amount of honey or maple syrup accordingly. If you prefer a less sweet treat, start with half the recommended sweetener and taste the mixture before adding more. This will allow you to tailor the sweetness to your preference and enjoy a balanced flavor in each cup.
Freezing Techniques
For optimal freezing, it's important to use silicone cups or muffin tins. These materials provide flexibility, allowing for easier removal once the yogurt has set. If you don’t have silicone cups, you can line metal muffin tins with cupcake liners to make removal easier but be cautious; they may not release as easily. Ensure that the filling is level within the cups to ensure even freezing and prevent the tops from becoming too wide or uneven.
When freezing your yogurt cups, a flat shelf in the freezer is essential to maintain their shape as they solidify. It’s best to cover the cups with plastic wrap or a lid to prevent ice crystals from forming on the surface. If you notice any ice crystals in your frozen yogurt, it could be a sign that your cups were not tightly sealed or that they have been stored too long. Enjoying the freshness is key!
Serving Variations
The versatility of Frozen Yogurt Ice Cream Cups means they can be customized according to your preferences and the seasons. Beyond mixed berries, you can try adding diced fruits like mango, peaches, or even chocolate chips for an indulgent twist. If you want to explore different flavor profiles, consider mixing in a tablespoon of cocoa powder or your favorite nut butter into the yogurt base before freezing, creating a delectable variety.
When serving, you can get creative with your toppings. Instead of granola, try crushed nuts or shredded coconut for added texture. A drizzle of honey or a sprinkle of cinnamon can also enhance the flavor profile. For an extra splash of color, consider using edible flowers or sprigs of mint. These not only elevate the presentation but also add refreshing notes that pair well with the fruity yogurt.
Ingredients
Ingredients
Frozen Yogurt Ice Cream Cups Ingredients
- 2 cups Greek yogurt
- 1 cup mixed berries (strawberries, blueberries, raspberries)
- 1/4 cup honey or maple syrup
- 1 teaspoon vanilla extract
- Granola and additional berries for topping
Mix and match the ingredients as per your taste!
Instructions
Instructions
Prepare the Base
In a mixing bowl, combine Greek yogurt, honey (or maple syrup), and vanilla extract. Stir well until the mixture is smooth and creamy.
Add Berries
Gently fold in the mixed berries into the yogurt mixture, making sure they are evenly distributed without breaking them down.
Fill the Cups
Spoon the yogurt mixture into silicone cups or muffin tins for easy removal. Tap gently to remove air bubbles and ensure even filling.
Freeze
Cover the cups with plastic wrap or a lid and place them in the freezer. Allow them to freeze for at least 2 hours or until firm.
Serve and Enjoy
Once frozen, remove the cups from the molds carefully. Top with granola and additional berries before serving. Enjoy your refreshing treat!
Store any leftover cups in the freezer for later enjoyment.
Pro Tips
- For a dairy-free option, substitute Greek yogurt with coconut yogurt. You can also experiment with different flavored yogurts to add variety to your cups.
Customizing Flavors
Feel free to experiment with different yogurt flavors, such as vanilla or coconut, to impart unique tastes to your Frozen Yogurt Ice Cream Cups. If using a flavored yogurt, you may want to reduce added sweeteners to achieve a balanced flavor. You can also incorporate spices like cinnamon or nutmeg for a warm, cozy vibe suitable for cooler months.
To create a dessert suitable for various dietary preferences, consider using dairy-free yogurt alternatives made from almond, coconut, or soy. These options still provide a creamy texture, though the final result may differ slightly in flavor and nutrition.
If you want to make a vegan version, substitute honey with agave syrup or omit sweeteners altogether and rely on the natural sweetness of the fruit. This way, you can enjoy a guilt-free and health-conscious frozen treat.
Storing Leftovers
If you have extra cups, they can be stored in the freezer for up to a month. Be mindful of not allowing the cups to remain in the freezer beyond this time, as they can develop freezer burn. To preserve their quality, consider wrapping each cup tightly in plastic wrap before placing them in an airtight container to minimize air exposure.
When ready to enjoy a frozen cup, simply remove it from the freezer and let it sit at room temperature for 5-10 minutes to soften slightly for easier consumption. Avoid microwaving, as the texture will not be the same, and you risk melting them unevenly.
After unwrapping, if you find the cups are too firm, just leave them to thaw a few more minutes, as they should present a nice, creamy consistency without becoming overly mushy. This allows you to maintain that refreshing yogurt ice cream experience.
Scaling Up the Recipe
If you're planning to serve a larger group, doubling the recipe is straightforward. Just make sure to have enough silicone cups or muffin tins available. You can also consider using a larger container, like a loaf pan, to freeze a bigger batch and scoop out servings when ready.
However, when scaling up, keep in mind that the freezing time may slightly increase, so always check for firmness after the standard two hours. A larger batch might need an additional hour or so in the freezer, depending on the size of your container.
To keep things organized, consider rotating the flavors when scaling up. For example, prepare one batch with berries and another with nuts or chocolate to cater to different tastes while still providing health-conscious choices.
Questions About Recipes
→ Can I use different fruits?
Absolutely! You can use any fruits you like, such as peaches, mangoes, or kiwi.
→ How long can I store these cups?
They can be stored in the freezer for up to 2 weeks, as long as they are airtight.
→ What can I use instead of honey?
Maple syrup or agave nectar can be great alternatives for sweetening.
→ Can I make this without added sugar?
Yes, simply use ripe fruits that are naturally sweet to eliminate added sugars.
Frozen Yogurt Ice Cream Cups
Created by: The Sizedbliss Team
Recipe Type: Artisanal Baking Recipes
Skill Level: Beginner
Final Quantity: 6 cups
What You'll Need
Frozen Yogurt Ice Cream Cups Ingredients
- 2 cups Greek yogurt
- 1 cup mixed berries (strawberries, blueberries, raspberries)
- 1/4 cup honey or maple syrup
- 1 teaspoon vanilla extract
- Granola and additional berries for topping
How-To Steps
In a mixing bowl, combine Greek yogurt, honey (or maple syrup), and vanilla extract. Stir well until the mixture is smooth and creamy.
Gently fold in the mixed berries into the yogurt mixture, making sure they are evenly distributed without breaking them down.
Spoon the yogurt mixture into silicone cups or muffin tins for easy removal. Tap gently to remove air bubbles and ensure even filling.
Cover the cups with plastic wrap or a lid and place them in the freezer. Allow them to freeze for at least 2 hours or until firm.
Once frozen, remove the cups from the molds carefully. Top with granola and additional berries before serving. Enjoy your refreshing treat!
Extra Tips
- For a dairy-free option, substitute Greek yogurt with coconut yogurt. You can also experiment with different flavored yogurts to add variety to your cups.
Nutritional Breakdown (Per Serving)
- Calories: 150 kcal
- Total Fat: 5g
- Saturated Fat: 2g
- Cholesterol: 10mg
- Sodium: 45mg
- Total Carbohydrates: 23g
- Dietary Fiber: 2g
- Sugars: 10g
- Protein: 7g